How to set MySQL Website Configuration Tool in Visual Studio?
This MySQL for Visual Studio feature allow you to configure this feature enables you to configure the Entity Framework.
Do you have similar website/ Product?
Show in this page just for only
$2 (for a month)
0/60
0/180
When you set configuration options within the tool, then the tool modifies your web.config file.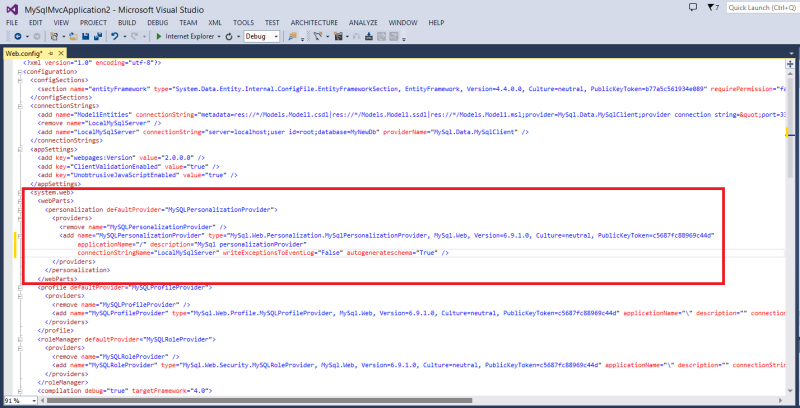
1.The MySQL Website Configuration Tool is shown as small icon on the Solution Explorer toolbar.Click on the Website Configuration Tool icon and the wizard displays the first step of Entity Framework.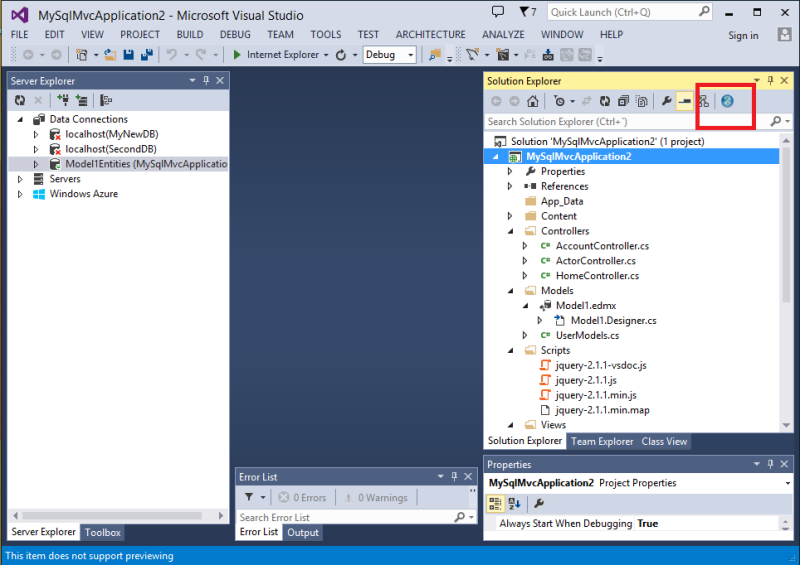
2.Click on the next to continue to Entity Framework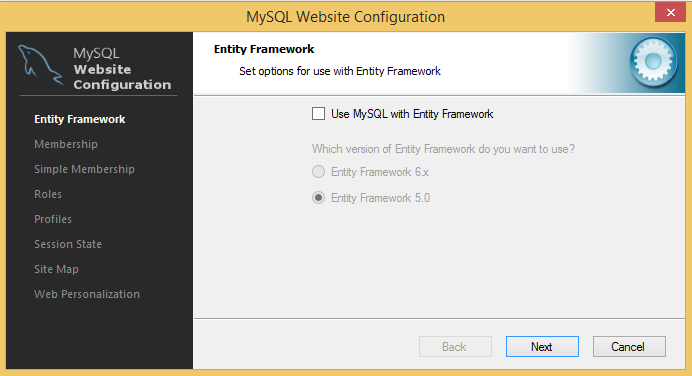
It configure your application to use Entity Framework 5 or 6 with MySQL database provider it add the required references to the project and updating the configuration file .
3.Click on next, it will allow to enable a MySQL Membership Provider. In addition to the advanced "Membership" provider, there is also a "Simple Membership" provider. You can only choose one of these two membership providers.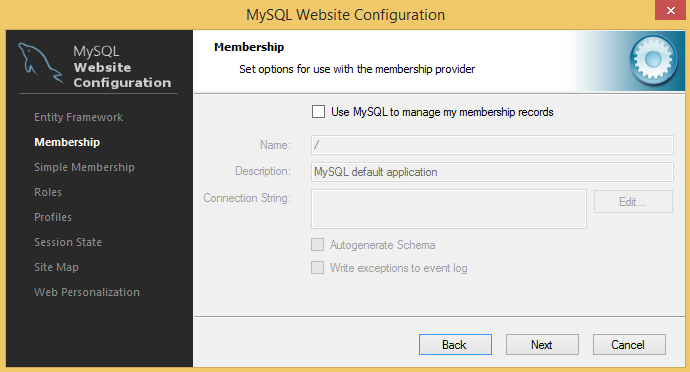
4.I f you want to use the more advanced "Membership" provider then select the "Use MySQL to manage my membership records check box to enable this.
Enter the name of the application that you are creating the configuration for.
Enter a description for the application.
Click the Edit button to launch the Connection String Editor
Click on the Advanced button a dialog will enables you to set Membership Options. 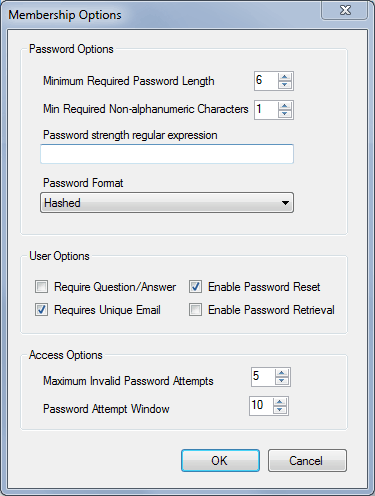
5.The "Simple Membership" provider is similar to the advanced version it just have less options.
To enable, check the "Use MySQL to manage my simple membership records" check box.
6.Now check the Auto Create Tables option to create the required tables when you need to add the first user to the table.
After setting membership provider, another section is added to the web configuration file.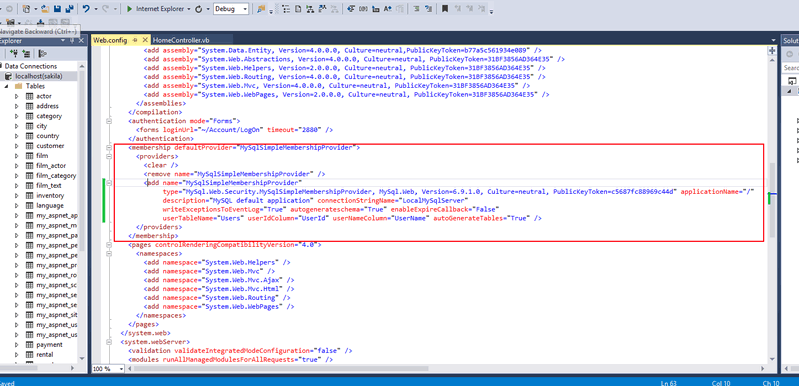
7.After setting up one of the membership providers click Next to configure the Roles Provider.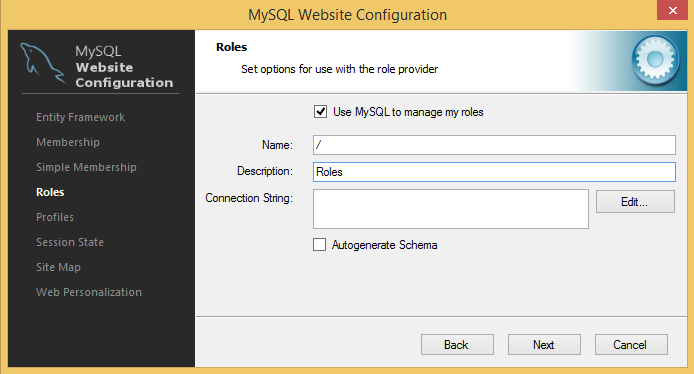
8.Connection string can be edited again and a description added and Auto generate Schema can be enabled click on the Next to go to the Profiles Provider screen.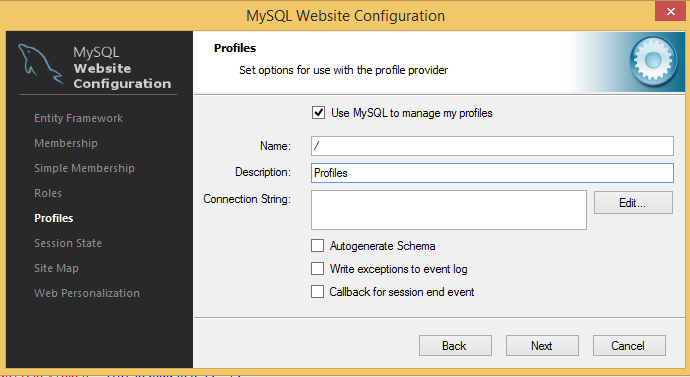 9.Screen will display similar options to the previous screens.
Click on Next.
9.Screen will display similar options to the previous screens.
Click on Next.
10.To proceed Site Map configuration page Click on Next.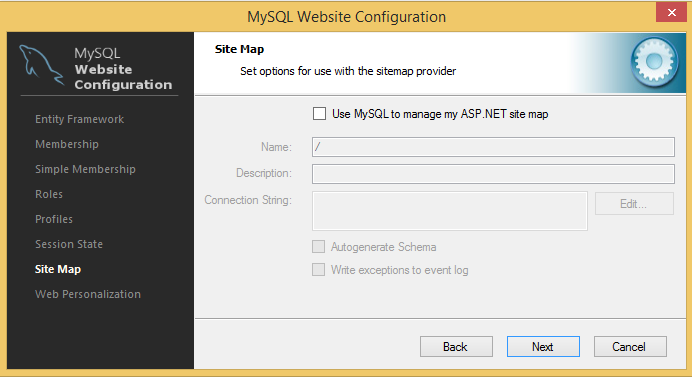
11.After setting the Site Map provider, a new section will be added to the web configuration file.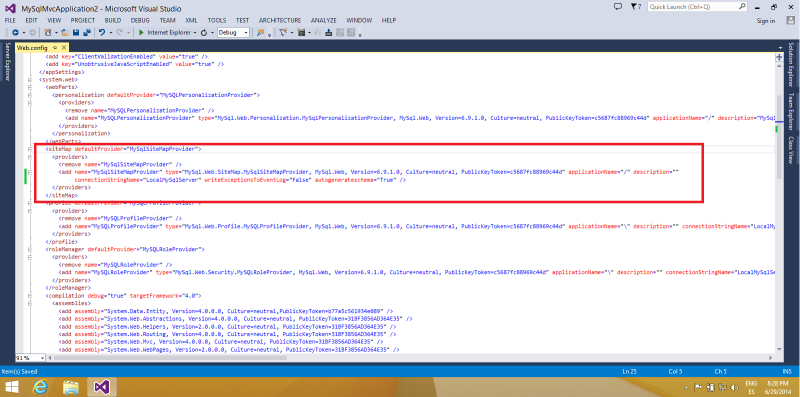
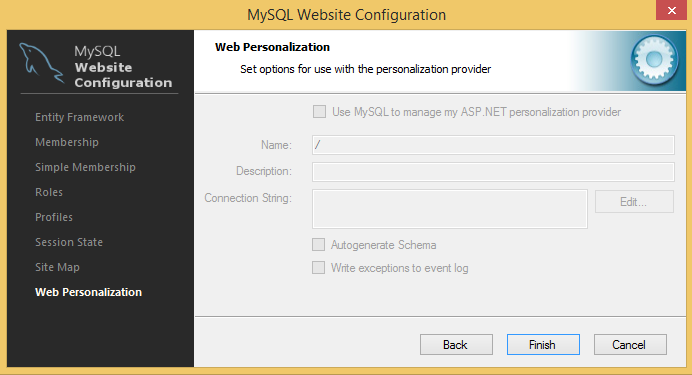
12.After setting up the Personalization provider, a new section will be added to the web configuration file.
13.Click on Finish .
CONTINUE READING
Visual Studio configurations
Ayesha
Tech writer at newsandstory